in this guide
A nominee is someone you choose who can:
- ask us things for you
- get your Centrelink payment for you
- manage your aged care costs
- act on your behalf.
Read more about someone to act for you.
Before you start, get the details ready of the person you want to nominate. This includes their:
- name
- address
- phone number
- date of birth
- Customer Reference Number (CRN).
You may also need their bank details if they will get money on your behalf. Step 3 has more information about nominee types.
If someone asks you to be a nominee, read more about how to respond to a nominee request.
The screenshots in this guide are from a computer. The page layout will look different if you’re using a mobile device.
Step 1: get started
Sign into myGov and select Centrelink.
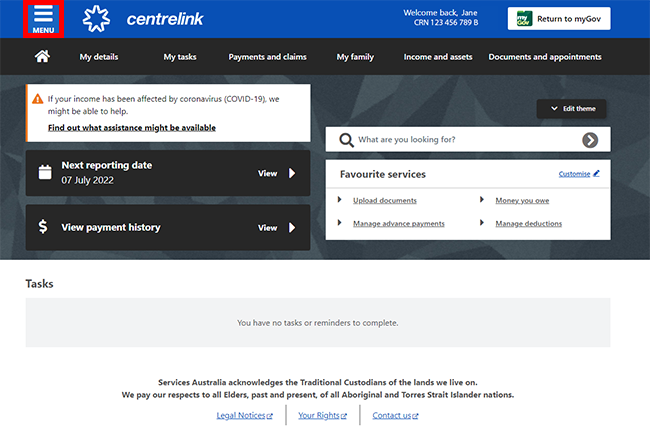
From your homepage select MENU.
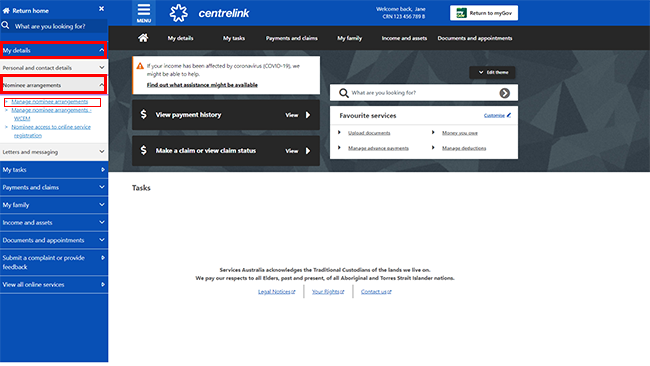
Select My Details, followed by Nominee arrangements and Manage nominee arrangements.
Step 2: check any nominees you have
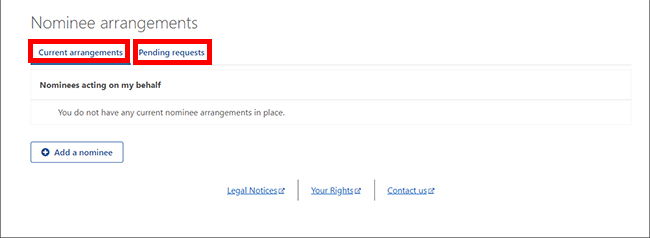
On the Nominee arrangements page view both your:
- current arrangements
- pending requests.
Check for nominees you have listed.
If you want to change a nominee, you need to cancel the nominee arrangement first. The Cancel your existing nominee arrangement guide shows you how.
Step 3: add a nominee
When you add a nominee you give them permission to do things for you.
There are 2 types of nominees:
- a correspondence nominee can speak with us and do most of your Centrelink and aged care business for you
- a payment nominee can get your Centrelink payments for you.
You can only nominate one person or organisation for each type.
You can’t have a nominee and be a nominee for some else at the same time.
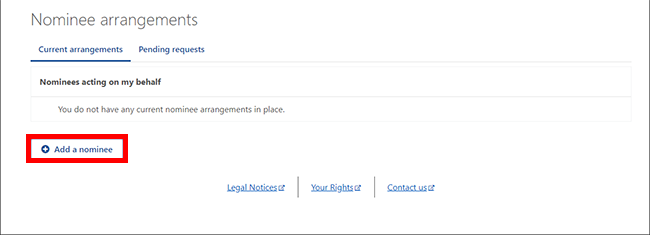
If you want to add a nominee, select Add a nominee.
You can add an organisation as your nominee if you know the organisation’s Centrelink Reference Number. If you or the organisation do not know these details you can fill out the Authorising a person or organisation to enquire or act on your behalf form.
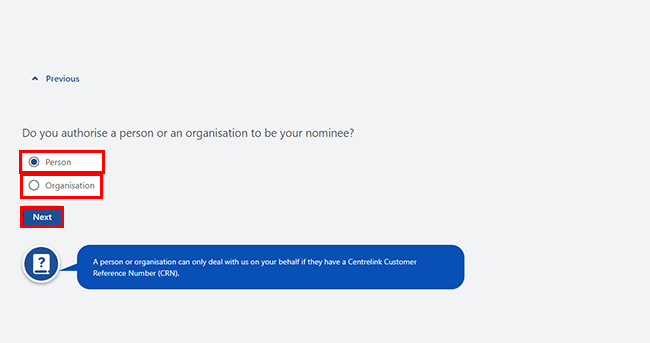
On the next screen, select who you want to authorise on your behalf, a Person or an Organisation. Select Next to continue.
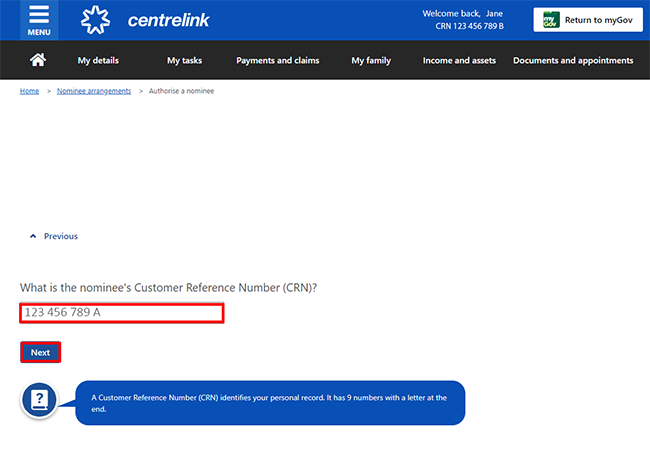
You need to enter details for the person you want to add, starting with their Customer Reference Number (CRN).
Enter their CRN and select Next.
If the person doesn’t have or know their CRN, they can apply online for their Centrelink customer reference number (CRN).
You will need to do the same on the next few screens for their title, name and date of birth.
Once you’ve completed the nominees details screens, you’ll need to select:
- Previous, if you need to change any details
- Select Home if you no longer want to add a nominee or start again
- Next, to continue.
On the next screens you need to tell us the nominee’s:
- relationship with you
- home and postal address
- contact details.
Then select Next on each screen.
If you choose a correspondence nominee arrangement, we’ll send copies of your mail to them. It will go to the postal address on their record.
If you don’t want us to do this, select Cancel. This will stop your request to add a nominee.
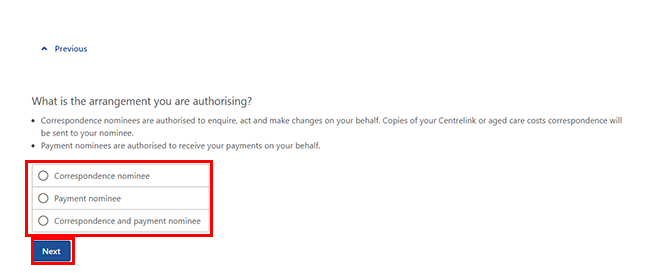
Select the type of nominee arrangement you want.
- A correspondence nominee can speak with us and do most of your Centrelink and aged care business for you.
- A payment nominee can get your Centrelink payments for you.
- A correspondence and payment nominee can be one person or organisation that is both types of nominee.
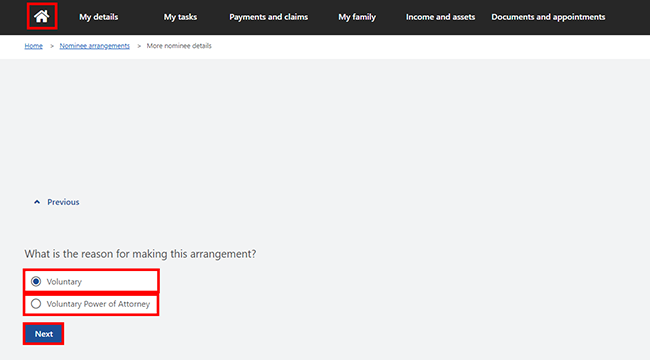
On the next screens you need to tell us the reason for making this arrangement.
It may be Voluntary, if you’re setting up this nominee to help with your Centrelink business.
It may be Voluntary Power of Attorney, if the nominee also has power of attorney for you.
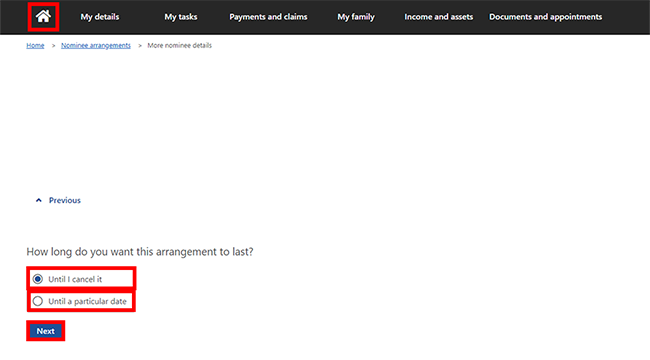
Select how long you want this arrangement in place.
- Until I cancel it, no end date.
- Until a particular date.
Then select Next.
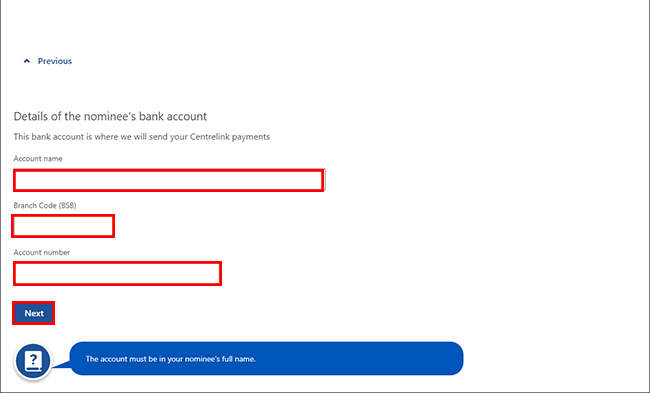
If you’ve selected payment nominee, we’ll ask for your nominee’s bank account details. This is the account where your payments will go.
You’ll need to enter all of the following:
- Account name
- Branch Code (BSB)
- Account number.
Then select Next.
Step 4: review and submit
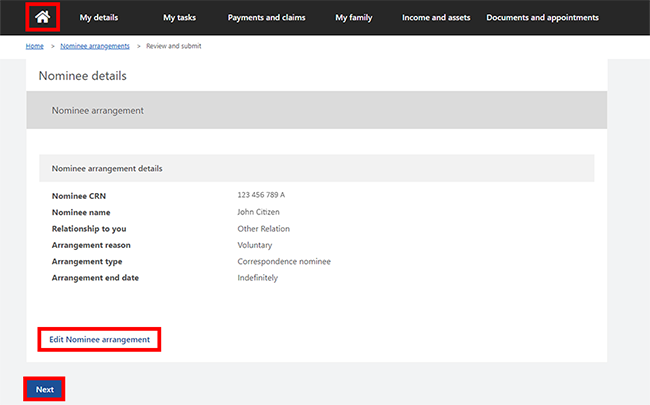
We’ll give you a summary of the nominee details you’ve entered.
Select either:
- Edit Nominee arrangement if you need to change any details
- Next to read the declaration page
- Home icon, if you don’t want to continue or you need to start again.
If all the details are correct, read the declaration. If you understand and accept the declaration, select I have read and agree with the above conditions then Submit.

Get your receipt
We’ll give you a receipt ID to let you know your update was successful. Make a note of this number for your records or select save your receipt.
You don’t need to contact us unless we ask you to.
Select either:
- Information you provided to view the details you’ve given us
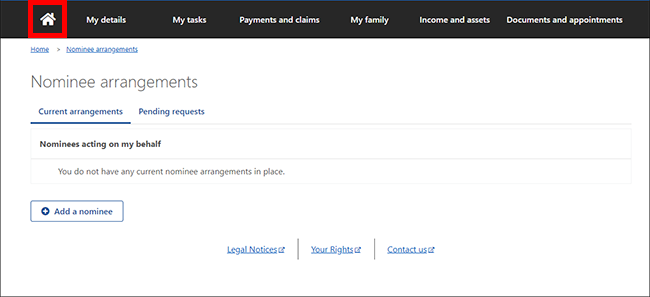
- Home icon to go back to your homepage
- Return to nominee arrangements to go back to your Nominee arrangements page.
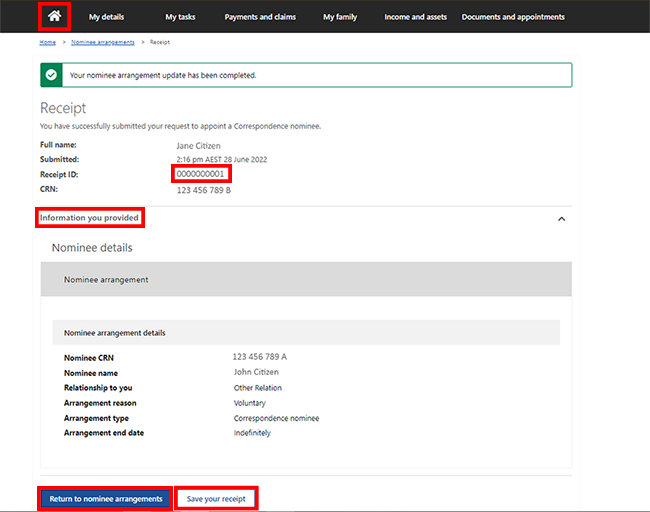
From the Nominee arrangements page, you can select the Home icon to go back to your homepage, then go to Step 5.
What happens next
Remember to tell your proposed nominee you’ve added them as a nominee. They need to sign in to their online account to accept or decline the request within 14 days.
If they don’t do this, the request will cancel automatically. They can view the Respond to a nominee request online guide for help responding to your request.
If they accept your request, we’ll tell you in a letter. You can see this at the current arrangements tab.
If they decline, you’ll see a message in the pending appointments section of your nominee arrangements page.
The message will be there for 21 days.
Cancel a nominee arrangement
Unless you cancel a nominee arrangement, it will remain in place indefinitely. You can cancel a voluntary arrangement at any time.
Read our online guide on how to cancel an existing nominee arrangement using your online account.
Step 5: sign out
From your homepage, you can complete other transactions or select Return to myGov to go back to your myGov account.
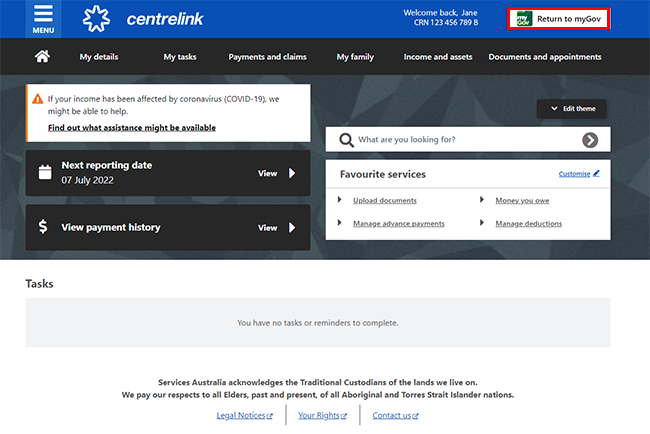
For your privacy and security, sign out when you have finished using your myGov account.
View other online account and Express Plus mobile app guides and video demonstrations about using your online account.