in this guide
Uploading documents to us online is safe and convenient.
You can upload and submit most documents with your online account through myGov or the myGov app. Read about what kind of Child Support documents you can submit online.
The screenshots in this guide are from a computer. The screen layout and steps may be different if you’re using a mobile device.
Before you upload a document, remove any password protection on the document.
Please make sure all images you upload are appropriate. Don’t upload any images that:
- are distressing, intimidating or offensive
- are of the human body as evidence of physical injuries or to support a claim
- could be considered illegal, as we may report them to the relevant authorities.
Step 1: get started
Sign in to myGov or the myGov app and select Child Support.
From the menu, select Upload documents.
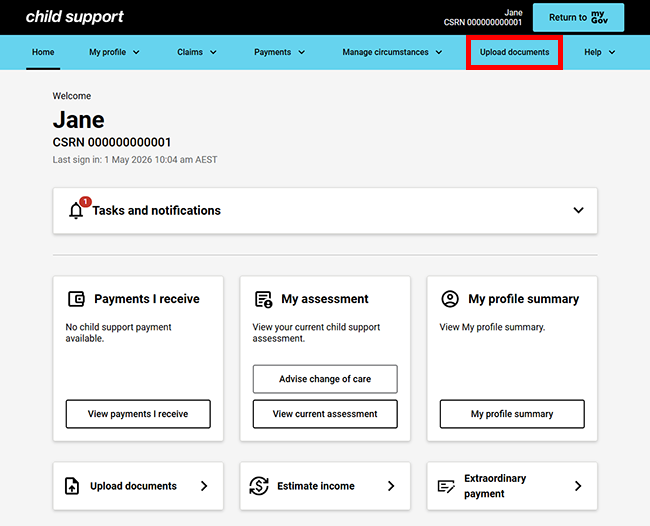
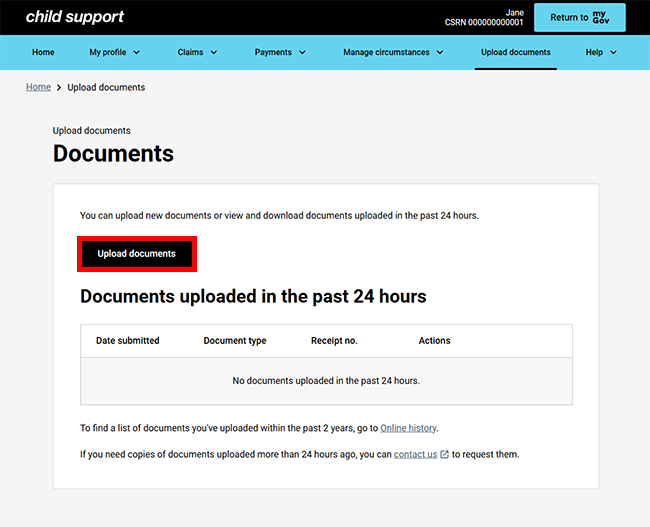
From the Documents page, select Upload documents.
Step 2: select a document type
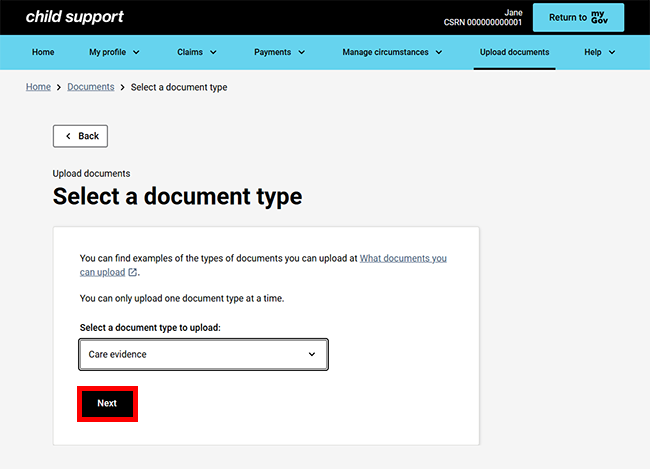
You can only upload one document type at a time.
Read more about and find examples of what documents you can upload.
Select the Select a document type menu.
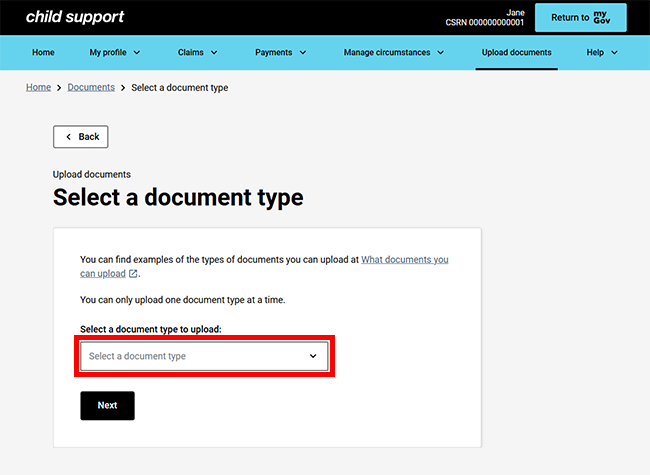
Select the document type you want to upload from the Select a document type menu.
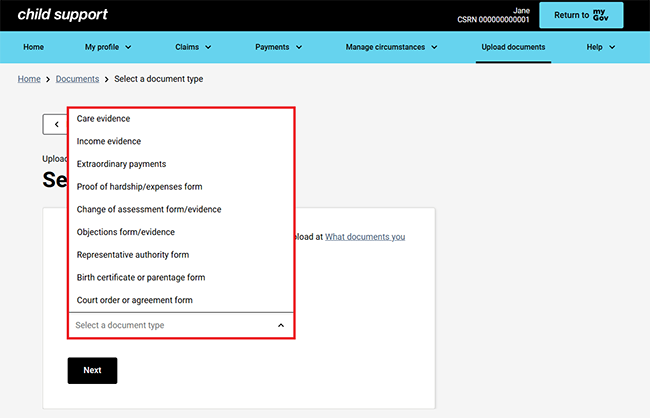
When you’ve selected a document type, select Next.
Step 3: upload your document
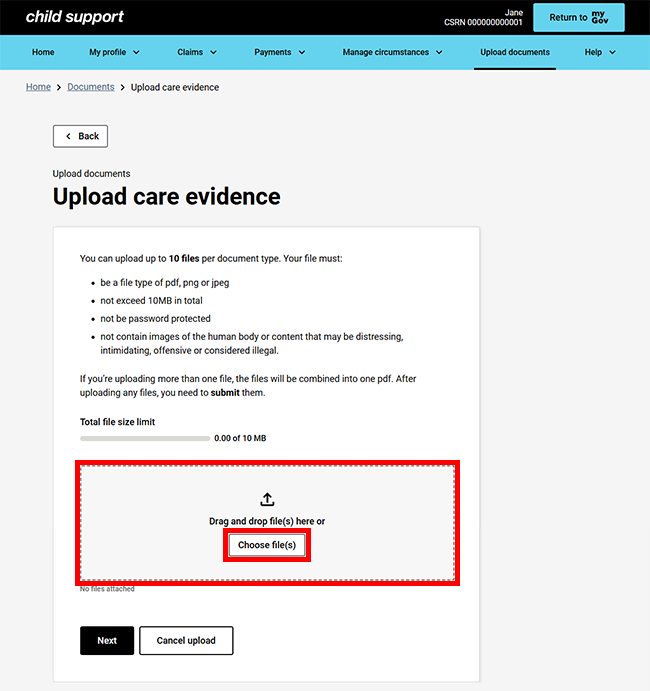
You can drag and drop your files in the Drag and drop file(s) here box or select Choose file(s).
You can upload multiple files of the same document type. The total file size of all files for a document upload must be under 10MB. Each file must also be in one of the following formats:
- png
- jpeg.
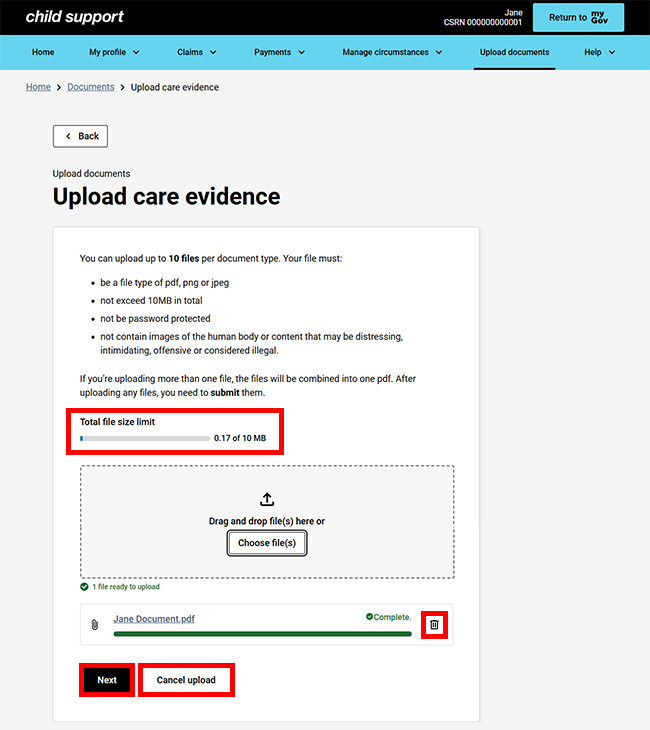
Your upload documents will display in PDF format and we’ll let you know how much of the total file size you’ve used.
You can add more documents by following the previous steps, or you can select:
- the bin icon to remove documents you no longer want to upload
- Next if you don’t have any more documents to upload and want to continue
- Cancel upload if you no longer want to upload a document or need to start again.
Step 4: review and submit
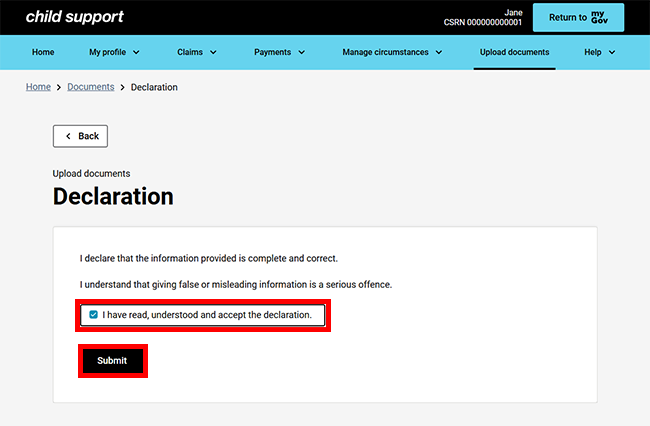
Read the declaration. If you understand and agree with the declaration, select I have read, understood and accept the declaration. Then select Submit.
Get receipt
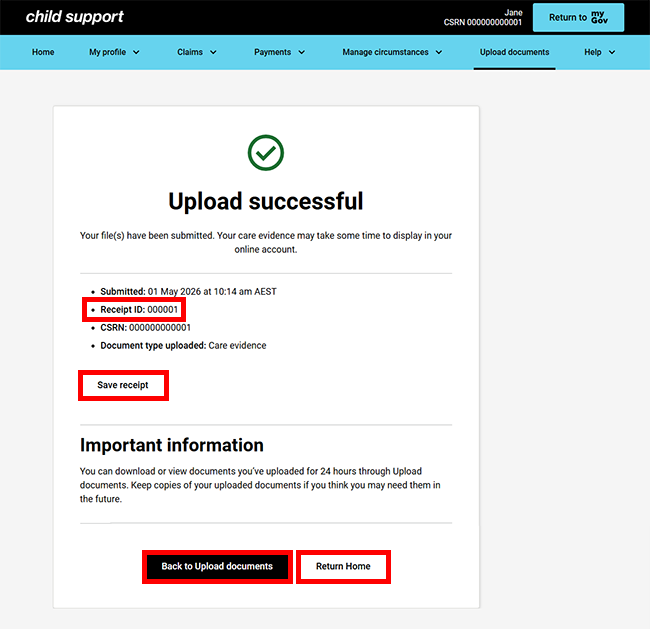
We’ll give you a receipt when you submit your documents. Make a note of the Receipt ID for your records.
After uploading your documents, you can select:
- Save receipt to keep a copy of your receipt
- Return home to go back to your homepage and go to Step 6
- Back to upload documents to upload more documents or view your document upload history and go to Step 5.
Step 5: view upload history
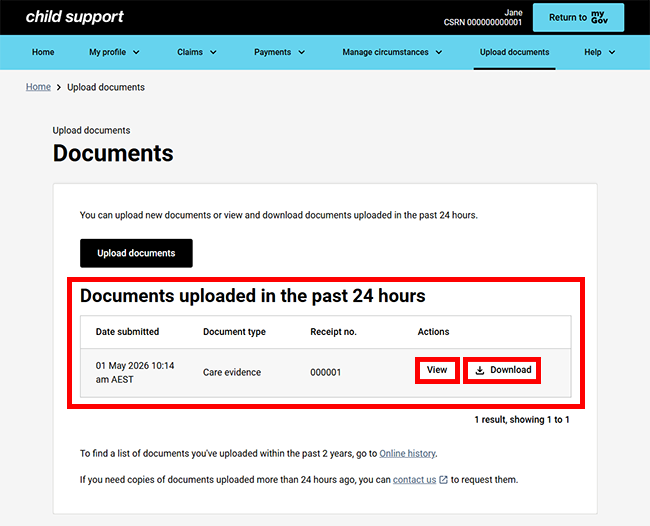
To protect your personal information, copies of documents you upload will only be available to download or view online for 24 hours. You can check the date submitted, document type and receipt number. You can select either:
- View to view a PDF version of the document. You’ll need PDF software to do this.
- Download to download a copy of your document.
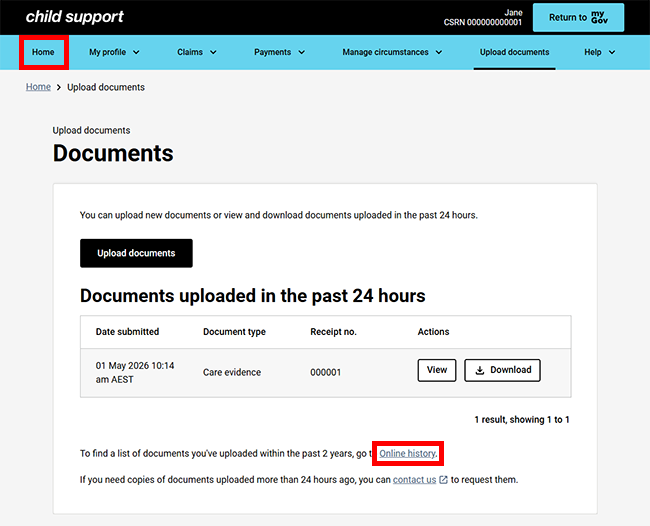
You can view a list of documents you’ve uploaded within the past 2 years by selecting Online history.
You won’t be able to view or download these documents, if you need copies you’ll need to contact us.
Select Home to go back to your homepage.
Step 6: sign out
From your homepage, you can complete other transactions or select Return to myGov to go back to your myGov account.
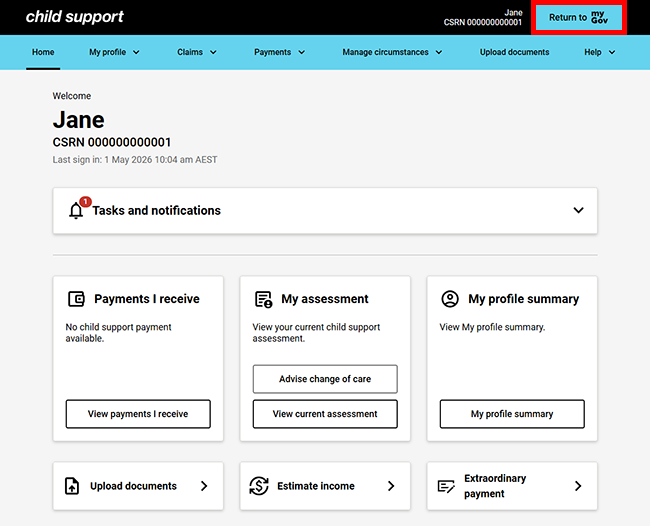
For your privacy and security, sign out when you’ve finished using your myGov account.
We have other guides to help you. Read about help for myGov, online accounts and mobile apps.